Wednesday, April 30, 2008

Dress Die Cuts by Sue Shute

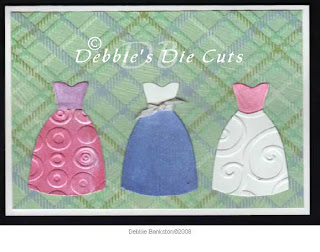
Well, Sue Shute has done it again...taken our die cuts and made them beautiful...This card features the dress die cut with some cool embossing and the scalloped round card with a tag...I just love that dress...
This dress looks like something I would wear this summer...just my colors and I love plaid...This reminds me of searsucker fabric...Very nice for a summer evening out...
I am loving all your designs Sue...Thanks so much for sharing your creations made with my die cuts...For more info on ordering the dress die cuts check out my studio blog at http://thestudioinpreston.blogspot.com
Thru May 5, all orders from Debbie' s Die Cuts will get 6 free white cardstock dress die cuts...

Sunday, April 27, 2008

Note pad and pen holder magnet

I just love coming up with new ways to use my die cuts...This is my new 4 inch circle cut from chipboard and covered with patterned paper...but the best part is....
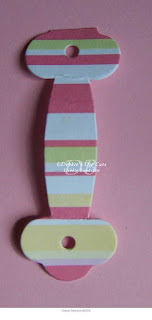
using the photo holder die cut as a pen holder...Oh my gosh...I had this on the back burner and just never took the time to put something together...Well, while doing all this cleaning and playing...I decided to make one...
All of the photo holder shapes will work...I just happened to choose this one...I trimmed the scallop off one end...so it would lay flat when I lined up the holes...
Curl the photo holder into a circle, lining up the holes...and thats how you attach it to the base piece...How easy is that...
I added the small sticky notes pad to this one...stamped the notes word image from Innovative Stamp Creations, sponged the edges and added the pen holder using a mini brad...I tried various types of pens and markers and found it worked to hold every one I tried...I put a piece of magnet strip on the back and voila...You can use it on the fridge, filing cabinet...or in my case my metal door in my studio...thats where this one will be... debbiesdiecuts@yahoo.com

Shower Tea Card Idea

A very good friend and her mom came and spent the day in my studio with me yesterday...We played, worked and played some more...She needed a shower tea invitation card idea...this is what we came up with...She wanted simple, basic but elegant...I think this covers it all...She will cut her own cards from cardstock, buy envy's at Office Depot...I cut her dresses, and black ovals...She has her own cuttlebug embossing folders and white ribbon...She is going to print her invite on the computer and attach inside with black photo corners...I think it will be a nice invitation when she gets done with it...

Die Cut Area---Cleaned Up

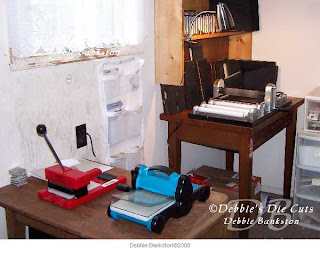
Yeah for me...LOL...I can see my die cut machines...notice...i did not take any before photos...
This shelf houses my accu cut dies and most of my sizzix dies and my sizzlet alphas...
I decided to use this shelf to house my towers with my sizzix alpha's...since they are not used as much...up there they are outta my way...

Strawberry Punch...

Well, its strawberries made using punches...gosh...its been ages since I made any of these...so easy and so fun...and around here all our strawberries fields are advertising the picking season...All you need is a heart punch and any sort of little daisy type flower punch...punch the berry from red cardstock, punch the flower from green...since it will be the greenery on the top of the berry...
Add some little black dots to be the seeds and I sponged some black ink around the edges...just to give some dimension...keeps it from looking so flat...I glued on the greenery and added some Ice stickles glitter glue to the center of it...

File Card Book--the beginnings

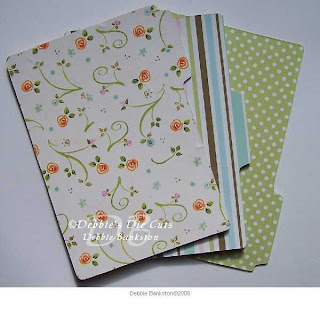
I have been wanting to make another file card book...and just never seem to have enough studio time to start one...Well...this time I at least got the chipboard file cards covered with my patterned paper...This is the front side of each file card...
This is the back side of each file card...I am only using 3 file cards to make this book...but you could use as many as you needed...
This is the cover so far...I have not attached the pink tag yet, as I have something to add to the green layering piece first...I will use my bind it all to bind this book...
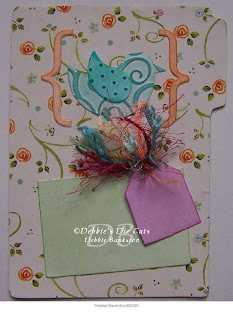
Attention to detail...I love my bird die cuts...and I love using my Cuttlebug embossing folders...I used the swirls on the bird and the dots on the wing...I colored each with ink using a stipple brush, then rubbed the ink pad over the raised embossed areas for more intense color there...I colored the mini brackets the same way... Be sure and check out my studio blog at http://thestudioinpreston.blogspot.com for this kit...and more coming soon...

Sunday, April 20, 2008

Carved Leather Piece

I used to carve leather and makes belts, wallets, and billfolds years ago...I still have all my tools...and been thinking of playing with it again...this was a little cabin I carved on a scrap of leather and used on my key chain for while...i found it in a box of my junk today while plundering...brought back lots of fun memories...

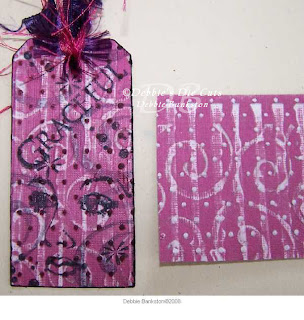
Layered Dry Embossing with Cuttlebug Folders-Original Design by Debbie Bankston

I love using the Layered Dry Embossing Technique on the bazill cardstock...that white core if fun to expose and use as part of a background...
I used the swirls first, sanded lightly, smoothed down, then used the stripes, sanded lightly, smoothed down, then used the dots and sanded lightly and smoothed down...
Then I stamped over the layers of dry embossing...using black ink and Innovative Stamp Creations Stamps...I added some gold paint using a scrunched up piece of saran wrap...
debbiesdiecuts@yahoo.com

Layered Cuttlebug Embossing Technique by Debbie Bankston

I have been asked by a few folks lately for another step by step way of doing my technique...I created this technique last fall..and waited until I got the newer Cuttlebug Embossing Folders before showing it...The first step is to choose 2 or more folders that you want to use in layers with each other...I have done as many as 5 layers, just to be sure it works with that many...I prefer 2 or 3 depending on what else will be added to the piece...Begin by embossing your first layer...here I have done the striped one...
Add ink by just rubbing the ink pad lightly over the raised embossed area...i usually work with lighter colors for my first layer, increasing intensity of color as I work...
I use my bone folder to smooth the embossing back out...but Jane says it also works to run it back thru just the plates on your machine...without the folder...i have not tried this...as I just enjoy using my bone folder to smooth the layers of embossing back down...I have a piece of fun foam under my work surface and this works for me...
when i say smoothed back flat...see the top layer is an embossed one, the second is embossing then smoothed back flat with my bone folder...
This is the second layer of embossing...
Then I add the coloring the same way, just rubbed the ink pad lightly over the raised area...
the last layer of embossing on this one is the dots...i love those dots...you will see me use the dots alot...
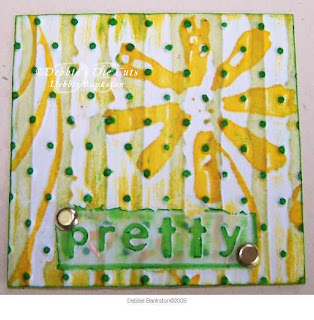
I used a darker green color on the dots as well as the embossed velllum piece that I tore from the sheet...this will make a neat embellishment for a card or scrapbook page...

Saturday, April 19, 2008

Doodle Art Cards or Artsy Fragment Cards


My version of Moo sized cards I made today...I used collage stamping, layered Cuttlebug embossing, decoupage and more to create these little works of art...Stamps are from Innovative Stamp Creations...Stay tuned for more info...I have a new die coming soon to cut "Doodle Art Cards" or "Artsy Fragment Cards"---This name was suggested by my very good friend Betsy and her hubby...for more info email me at debbiesdiecuts@yahoo.com

Wednesday, April 16, 2008

A Day at the Beach...a Cold day at the beach

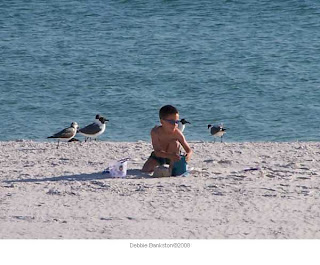
My grand kids are out for spring break this week...so, Moma wanted to take them to the beach...Well, as luck would have it...a cold front came thru...so we went to Florida to freeze our patooties off...LOL...gees...but, it did not keep my grand son from playing in the sand...
My mom and grand daughter are feeding the gulls...I am on the balcony of the motel room watching them...and of course taking pictures...I was enjoying the sun and reading a book...
The gulls are fun to watch as they feed...I love the photos of them in flight...I have some new projects in the works...and another new custom die on the way...so stay tuned and I will share more soon...

Sunday, April 13, 2008

ATC chalked bird

I just love my new images from Great Impressions...i got a whole box of stamps yesterday I ordered from http://www.hmstamps.com/ I stamped the bird in black document ink, and then chalked him in and added a phrase from my Time to Stamp images and then used my black marvy marker and spritzer to add some black spatters to the ATC...I sponged blue ink around the edges...

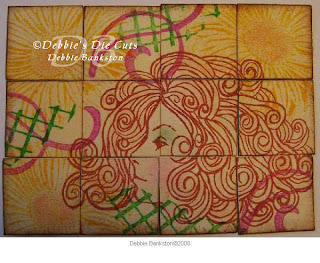
inchies can be puzzling...or not...

I lined up twelve cardstock inchies side by side...
I love collage style stamping...I chose some cool images from Innovative Stamp Creations and stamped them using Ranger inks...
I added a bit of chalking to the face...then dusted the entire thing with butterscotch ink...
I sponged the outter edges of the pieces with brown distress ink...
Oh, inchies can be so puzzling...or not...Now, isn't this a fun way to make your inchies into something playful..

B inchies for SSR swap Beadazzled Blossoms...

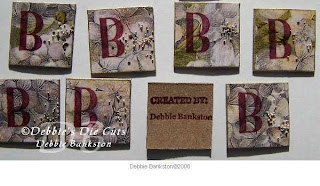
My 26 alpha inchies...the letter B on hydrangea blossom background paper sealed with Ranger Glossy Accents and Beadazzles sprinkled on for fun...
I love my tiny stamp with my name and my created by stamp I got on a sheet from Innovative Stamp Creations...

I hope you enjoyed my B inchies...

Round Scrapbook pages-so far

This is front and back of one of the pages for my grandson's baseball scrapbook...I ordered the Charlie Brown stamps from http://www.hmstamps.com and wow...the service was fast and I love my new stamps...I stamped the images in coffee archival ink, then colored them in using Marvy Waterbased Markers
I will be glad to get some photos made of him to put in the book...his first game got rained out Saturday...so no photos yet...

inchie art-little masterpieces book idea

I cannot wait to get my Alphabet Swap Inchies from SSR group...I am going to display them in a Skinny Minny Book...This little book is perfect for 3 inchies per page...I am already working on ideas for my Alphabet Inchie Skinny Minny Book...
Each page shows off 3 inchies...These are some of the various inchies I have made over the past few months...
They range from cardstock, chip board, glossy cardstock, fun foam and more...
I love to stamp parts of large images and even just eyes from a face...
Some inchies are just hand drawn art and simply colored in...
Some inchies even use those little thumnail photos...Remember...You are Only Limited by your Imagination...
What a perfect ending...I love that little bunny stamp...