Wednesday, October 25, 2006

Altered Keepsake Treasure Chest


These little keepsakes are a treasure to create...There are so many possibilities for them...You can use them to give special treats to a friend...make a mini altered book to fit inside...make a mini accordian scrapbook for a special family member...perfect for special jewelry to fit inside...Remember...You are only Limited by your Imagination...
These Altered Keepsake Treasure Chests were designed by me and Kathy Dirks of Texas...We will have more to share soon...You can see these and ordering info at http://www.picturetrail.com/debbiesdiecuts

ATC's


ATC's-Artist Trading Cards-are wonderful little pieces of artwork...The only rule for an ATC is it must be 3.5 x 2.5 inches...The can be cut from just about any surface media...Cardstock, chipboard, mat board, foam core, fabric, wood and more...You can decorate your ATC in just about any media there is...I love to create stamped ATC's...I have even done miniature decorative paintings on them...They are a wonderful canvas for creating mini masterpieces...I have my ATC's in a three ring binder album, with each ATC in a baseball card sleeve...I have ATC's that I have collected in trades and swaps for about 10 years now...Here are a few of the most recent ATC's I have done...These ATC's are done from a die cut I designed...I have a custom die cut ATC and Frame with a 2.5 x 1.5 inch opening...They make perfect little framed art ATC's...I also use these in my scrapbooking too...they are perfect size frames for my Altered Art Tag Books...

Tuesday, October 24, 2006

Marvy Marker Technique


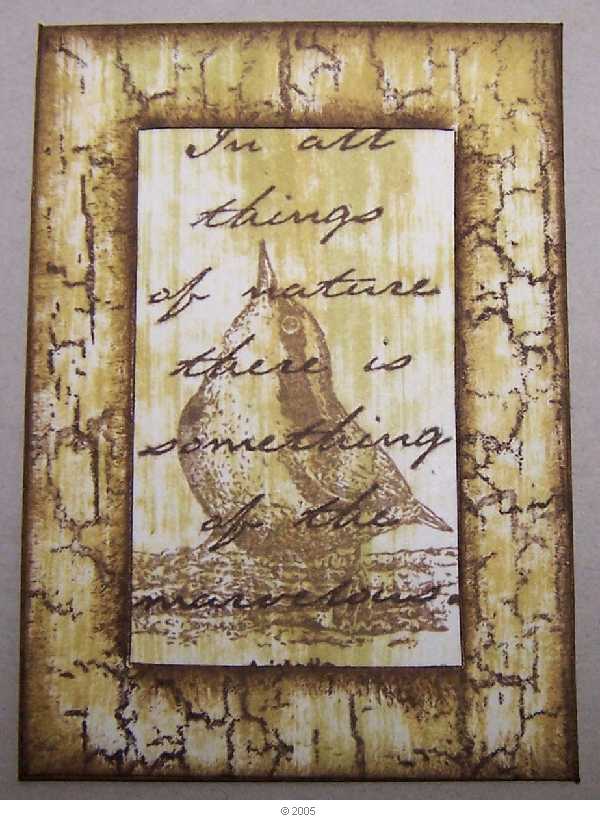
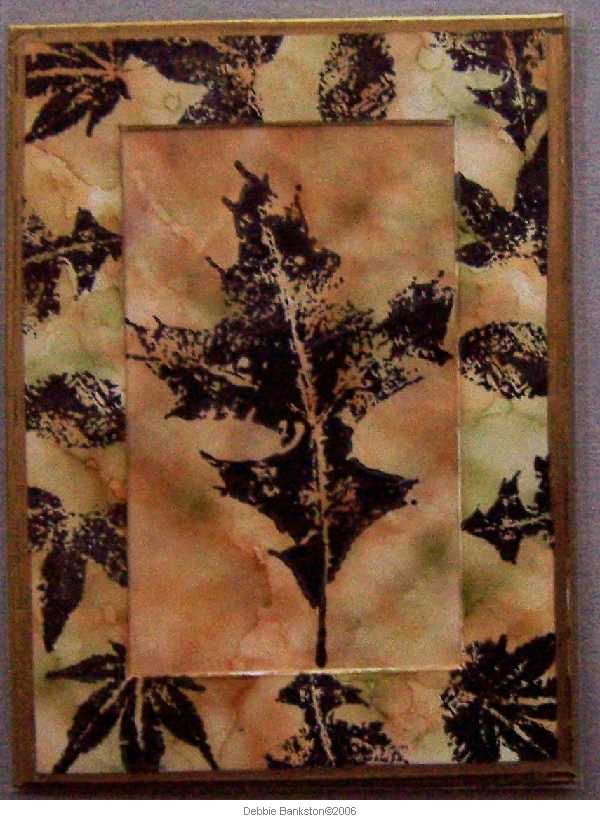
I made this card using the marvy marker direct to rubber technique...I colored the stamp with waterbased marvy markers, huffed onto the stamp (this uses your hot breath to reactivate the ink before stamping) then stamped the image onto the card layer...Dee Gruenig has a wonderful set of marvy markers in her signature line colors...I have this set, as well as lots of other marvy markers purchased in sets and individually from stamp shops over the years...once you have stamped your image the first time, you can re-huff the stamp and stamp again, or you can spritz water from a fine mist spritzer bottle, pull the stamp thru the mist in the air, then stamp the image again...this time you will get a water color effect, usually you can get two huffed, stamped images and two mist stamped images from one inking, depending on the detail of the image you are using...This technique can be done using any "waterbased" markers, but do be sure they are waterbased, as other markers will not work well for this technique...do not use Sharpie, or other permanent or alcohol/chemical ink based markers, as they will not work at all, and will permanently stain your rubber stamps... The card on the left is the first generation stamping and the one on the right is a second generation stamping after it was misted...you can see more of my artwork on my picture trail site at http://www.picturetrail.com/debbiesdiecuts

Altered Tag Book pages


This is an Altered Tag book I made from one of my kits. This kit uses the larger tag, so you can use full 4 x 6 photos if desired. I used Ranger Distress inks and Nick Bantock inks from Ranger, along with Innovative Stamp Creations stamps...I chose the ink colors based on the colors in the photos, then colored each tag and did the background stamping, then I colored the other die cuts I was using for embellishments and the die cut frames to coordinate with the background tag, and the photo I was using...This was a fun book to make...you can email me at debbiesdiecuts@earthlink.net for more info about my altered tag book kits...

Monday, October 23, 2006

Autumn tag swap


I made this tag for an Autumn themed tag swap I hosted...I used a masking technique, Innovative Stamp Creations stamps and Ranger inks to create the large background tag...I used post it note to mask off the bottom section of the tag, on the remaing section, I stamped a border type image repeatedly across the tag, then using the same color of ink, stippled the ink over the stamping, when that section was dry, I masked it and did the opposite side of the tag in the same way...The small tag was stamped with the pumpkin image and then watercolored using Marvy Markers and a waterbrush...after that was dry, I stippled the entire tag, then applied a layer of Ranger Glossy Accents to the pumpkins...Ribbon was added using the Fastenator to the large tag and tied onto the small one...

Beach Trip Mini Book


I used the Sizzix mini book die cut to cut the pages for this mini book...Ranger inks and Innovative Stamp Creations Stamps were used...I began creating the pages by rubbing the ink pad across the book page die cut. Do this until the desired color, effect is achieved...Stamp images as desired...I used the Rectangle Templates from Evolving Images http://www.evolving-images.com/ to crop the photos...These templates are wonderful, because they are clear, so you know exactly where to cut and what your photo will look like once its cropped...Continue each page in this manner. I used Ranger Glossy Accents to adhere all the embellishments. Its a wonderul glue for the heavier items and the metal items...I then used black plastic snap rivets to bind the pages...I painted the tops that show on the front with orange acrylic paint from the Ranger Adirondack line...These paints are wonderful...I get all my Ranger supplies thru Betsy of http://www.innovativestampcreations.com she has great service as well as great stamps.

A little about me

My name is Debbie and I live in Georgia with my wonderful husband. I love creating with die cuts. I have a few different die cut machines and even have a small online die cut business. I work from a home studio where I dont have to clean up or put things away...I will be holding classes and scrapbooking crops there also...I will be sharing some of my artwork here along with photos and instructions for making some of the projects I create and design. I have been an artist for over 25 years...I began tooling leather when I was 17 and from there was involved with Stenciling, faux finish painted techniques on walls...For quite a few years I had my own wood shop and cut and designed wood pieces that I painted and sold at Arts and Crafts fairs...For a few years I painted T-shirts, sweat shirts and even mens suit jackets...I still own some of the shirts I painted from the early 1990's...When I discovered Rubber Stamping...it opened up a whole new world for me and my creative side...I have worked at just about every leading arts and crafts chain there is...I have been an instructor/demonstrator/designer for almost 20 years...I am a Certified Product Knowledge Instructor thru Plaid Enterprises...I enjoy mixing all forms of media on all kinds of surfaces to create art... I will look forward to sharing some of my newest creations with you here...but you can see more of my artwork on my picture trail site, along with all the die cuts that I offer for sale. http://www.picturetrail.com/debbiesdiecuts