 Check out the special offer on my studio blog http://thestudioinpreston.blogspot.com
Wednesday, October 31, 2007
Sunday, October 28, 2007
Vintage "inchie" art from a catalog
 Oh my gosh...were these fun to make...I got this Victorian style catalog...and lo and behold...its awesome...One page had these little round shapes, perfect for layering onto my round "inchies", which I just love...I used my Royal Coat Decoupage Medium to glue the magazine cut outs to the cardstock "inchies"...then used my gold metallic marker to trim the edges...
 I do not have a circle punch yet, the size I need for layer...but I do have this scalloped edge square punch that is 7/8th of an inch, perfect for layering onto the square "inchies"...I turn the punch upside down, find the part of the shape I want, then punch it out...
 See how many more shapes I will get to use, just from a small section of this catalog...
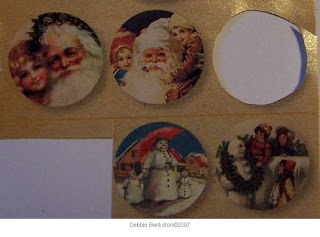 These are the other round shapes that are left to be used...
Thursday, October 25, 2007
License Plate Book

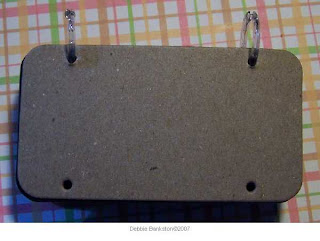 Check out my studio blog at http://thestudioinpreston.blogspot.com for a special offer on this newest book kit from Debbie's Die Cuts...
Shattered Glass Technique Tutorial...
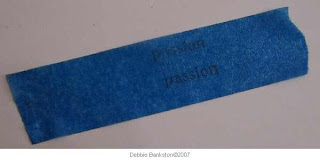 This is one of my favorite techniques, especially to do on black or any dark colored cardstock...I learned this technique from Carol Heppners first article about it...and I have been a fan ever since...I do some things a bit different maybe, than Carol does...but I always give her credit for my learning this technique...Begin with Blue Painters Tape...then, de-tack the tape by sticking it a few times onto a non fuzzy type of fabric...I use my blue jeans, since thats what I always wear...
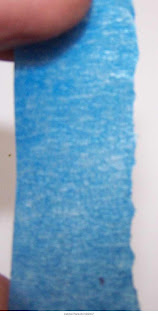 Begin, by creating a torn edge down one side of a length of the tape...
 Then begin, tearing the rest of the tape into narrow strips...so that both edges are torn...you want this ragged edge for the shattered glass effect...
 I used a small black cardstock tag for this project...this tag measures approx. 2 x 3...
 Create an interest pattern using the torn tape pieces...I also like a solid border, so I tape my edges too...
Shattered Glass Technique Tutorial...Part 2
 Decide what paints, you want to use, then using a sponge, stipple brush, even your fingers, you can apply your paints...
 I love to do this technique with metallic or pearl paints...but you can use any paints...I have some samples from about 8 years ago...that are just plain acrylic paint...On this tag, I used my Adirondack Acrylics...these have a pearly metallic finish to them...
 Be sure and let the paints dry...then decide which images you want to use...I used a cube stamp from Judi-Kins and Black Document Ink on this one...Randomly stamp your images...
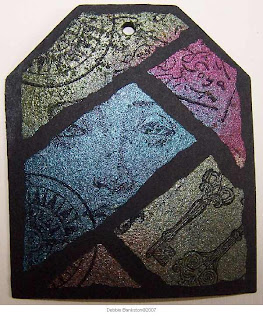 Then carefully remove the tape to reveal the black cardstock underneath...Now, your shapes, look like shattered glass pieces...
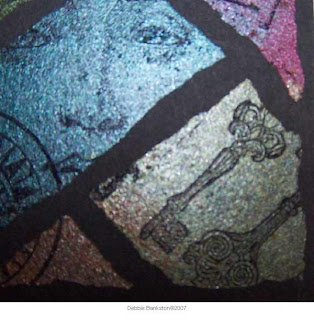 A closer look...I have done this technique on paper mache boxes, that I base coated with black paint...I am working on some more samples using this technique and will share them later...
Box Closure Tutorial...
 I figured out another way to make a closure for the Treasure Box, made from the matchbox die cut...This is when using the outer piece as a wrap instead of sleeve...I attached an eyelet to the flap...
 Then I tied on some beautiful raffia I just got from Really Reasonable Ribbon, this stuff is awesome...I tied the raffia on, leaving a long tail, then enough to wrap around the box and use the tail to tie a bow...
 Wrap the raffia around the box...
 Then using the remainder of the wrapping piece, and the tail you left from tying it to the eyelet...
 You tie a bow...This is going to be so much easier than some of the other closure methods I had been using...This box was painted using Adirondack Pearl Paints, then stamped with a background image from Innovative Stamp Creations...
Tuesday, October 23, 2007
"inchies" with Innovative Stamp Creations
 I adore Betsy's "inchie" images...these faces are beautiful...I started with thin chipboard, white on one side, used alcohol inks and copper mixative, stamped the images in Black Document Ink, then trimmed each "inchie" with copper metallic marker...when dry, I sealed each "inchie" with Ranger Glossy Accents..
Snowflake Cuttlebug Card 'n Envy
 I used my snowflake cuttlebug embossing folder, inked up with Periwinkle Ranger ink, trimmed, rounded corners layered onto 4.5 inch square card front...I used my Cuttlebug slide stamped with The Stamping Studio image attached to the card front with pop dots and raffia from Really Reasonable Ribbon...Snowman image stamped on scrap cardstock and trimmed, attached to card using double stick tape...
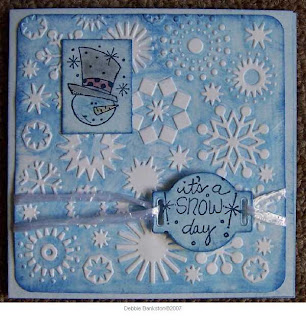 To ink up the embossing folder, I removed the lid from my ink pad, and rubbed the ink pad across the embossing folder...Then quickly place my cardstock inside and run thru my Big Shot machine...Be sure and wash your cuttlebug embossing folder to remove any excess ink...I use waterbase inks, and a soft toothbrush and soap to remove the ink, rinse and dry...Be sure the folder is dry, before storing it...
 I also used the Cuttlebug embossing folder as a stamp...I inked up the raised image side of the embossing folder, then pressed it onto the die cut envy...I repeated until the entire die cut was covered with the snowflakes...I used Stonewashed Adirondack pad on this one...It gives a very nice distress, stamped background...Imagine the possibilites...
Thursday, October 18, 2007
Altered Chipboard Letter B
 This was so fun to do...I am going to be doing an alphabet die cut letter name swap after the first of the year...so I decided to practice today...LOL...I used my Sizzix Shadow Box letter B...basecoated the letter off white, then used my alcohol inks to color the background, then added a layer of Ranger Glossy Accents, sprinkled some Beadazzles Beads, an acrylic rhinestone and a leaf embellishment...I trimmed the letter in gold metallic paint pen...
 This was the first photo I took of the letter B...I realized the flash kinda washed it out...but it does show some of the detail...after I used the alcohol ink on the letter, I used a background stamp from Innovative Stamp Creations, Prickley Pear Rubber Stamps and Purple Onion Designs...its hard to see the stamps in the photos...but they really show up good...
Take Out Box Die Cut-with a Twist....
 I used the take out box die cut from http://www.picturetrail.com/debbiesdiecuts and removed the flaps from the box...It now makes the neatest little basket type box...I love it...I began by using my stipple brushes and applying color to the box on the left...I used Butterscotch and Lettuce Adironadack inks...then used Library green Archival ink and stamped the leaves randomly all over the die cut...I added the beautiful raffia I just got from Really Reasonable Ribbon for the handle...the box on the right I stamped the holly image from Innovative Stamp Creations with Library green ink on the front and back panel...then using the same image, off stamped it over the rest of the take out box die cut...I used watercolors to color in the holly leaves and berries...I used my spritzer and some marvy markers to add the spattering to the die cut...after it was dry I then sealed this with one coat of Royal Coat Decoupage Medium...
 Inside view of take out box basket...I will get a lot of use from this basket box...
Sunday, October 14, 2007
Accordian Book Tutorial 1
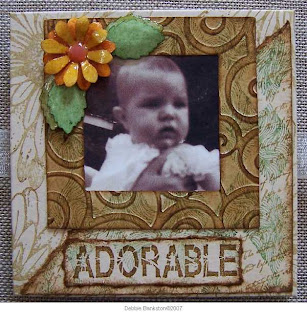 This is the finished cover of the book...it contains copies of baby photos of me...I used stamps from Innovative Stamp Creations...Cuttlebug embossed die cuts...Ranger inks...This is an accordian book I have taught for over 10 years...I love doing these little books, and have made lots of them for family and friends over the years...
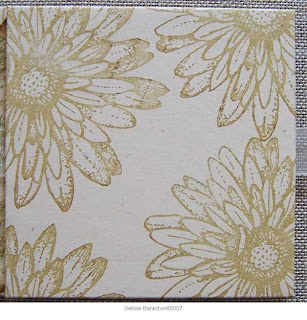 I start with chipboard covers, plain text weight paper that I stamp with a background and then cover the chip board with that paper...
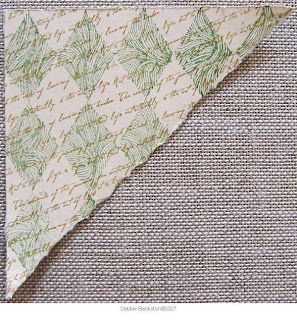 This is part of the layering for the front and back covers...I start with a square, stamped, then torn in half...one half goes on each cover of the book...
 I sponged the edges of the layering piece to help give it dimension...then layer onto the covers...
Accordian Book Tutorial 2
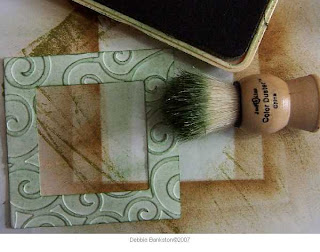 I run the die cut frames thru the cuttlebug embossing folder, then add coloring with color duster brushes and Ranger inks...
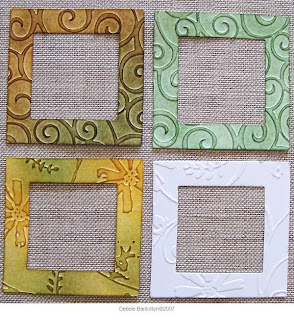 These are some of the frames I used in the book...
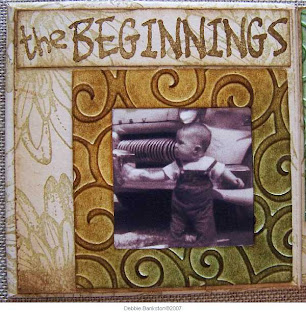 The scrapbook layout words from Innovative Stamp Creations were perfect for my book...I love Betsy's word stamps...they are so versatile...
 This is my Wonder Horse..I remember that horse...
Accordian Book Tutorial 3
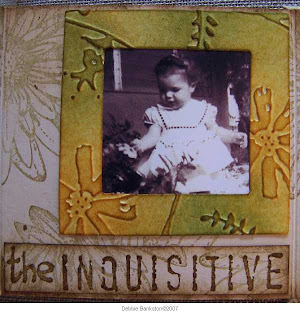 It was so neat being able to make a book using some of these photos...they bring back such memories of my childhood...I loved the flowers in my grand mothers yard...and even tho I did not pick them, I was curious about them...Those same flower bushese were still there when she passed away in 1997...
 This is a special photo...that was my first rocking chair, that unfortunately...I never got to keep...but enjoyed it as a child...My daddy's stero cabinet is behind me and moma made the dress I am wearing...I used the Sizzix photo corners here...
 Overview of the book...I hope you enjoyed my story...These little books will make wonderful gifts to share with your family and friends...Wallet sized photos are great to use in these books...
 Lots of different closure methods can be used for these little books...I love to use ribbon, be sure and attach the ribbon between the inside back cover and the back page of the accordian...The ribbon I use is from Really Reasonable Ribbon...
All My Heart Card-Tutorial
 Stamp the beautiful harlequin background from Innovative Stamp Creations on the entire card, then over stamp with the Sunflower image...I off stamped the sunflower once before stamping on the card...
 Here are some of the embellishments for the card front...The die cut heart was colored using a stipple brush and the same ink as the sunflower was stamped in...
 The photo corner die cuts from Sizzix were run the the cutttlebug swirls embossing folder...The solid strip of cardstock as attached using Fastenator Staples...
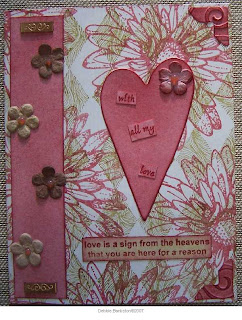 The finished card after all the embellishments are added...
Friday, October 12, 2007
Thursday, October 11, 2007
The Studio in Preston
The Studio in Preston...is the name of my studio...and its also a blog site with some limited quantity items I have for sale...These are directly from the studio and not listed on my picture trail site...if you would like to see what I have go to http://thestudioinpreston.blogspot.com/
If you have any questions about the items for sale there or to buy them, email me at debbiesdiecuts@yahoo.com
If you have any questions about the items for sale there or to buy them, email me at debbiesdiecuts@yahoo.com
Tuesday, October 09, 2007
Accordian Book using Sticky Notes Cover & ISC
 This is the cover for my accordian book...I will use pictures from our pumpkin patch visit later this month...will share that part, when I get it finished...I stamped the pumpkins from Innovative Stamp Creations, then watercolored them...I then masked them to over stamp the rest of the cover witht the ISC sunflower image...I then dusted the book with Butterscotch ink and my color duster...
 I coated the pumpkin image with Ranger Glossy Accents, I love the raised dimension it gives the pumpkins...The beautiful ribbon is from Really Reasonable Ribbon...You can find links to all the products in my Favorites...more to come on this one...
Subscribe to:
Posts (Atom)

