Wednesday, January 30, 2008

New Sheriff Car in Town...

My hubby got his new patrol car today...He is a happy camper...Its in the shop now, getting all the lights, bells, whistles, radar, etc...He hopes to be on patrol in it by the weekend...
I will take more photos of it, once it has all its lights, lettering, etc...I hope to be riding in it with him sometime over the weekend...All the other cars are gold in color...he got the first black one...yeah, they are all jealous...LOL...

Tuesday, January 29, 2008

Stamping with Innovative Stamp Creations

Betsy has some awesome new stamp sheets... http://www.innovativestampcreations.com Ranger inks used to stamp the images and then stipple brushes used to color the entire card...I colored the scalloped circle then stamped the verse...I then off stamped the butterflies once each before stamping on the scalloped circle...I sponged the edges with the blue ink...

Sunday, January 27, 2008

I Flourished and Swirled today...Instructions and how to's...

Oh, I am such an addict...LOL...these flourish/swirl die cuts are so cool...the pink and green ones here started out as chipboard, coated with off white acrylic paint, when dry, I used Ranger Alcohol inks and gold metallic mixative on them...they are so cool...the blue one, was a white cardstock die cut I used blue metallic paint to color the entire die cut then sponged on some gold metallic paint for an accent color...very yummy colors in real life...
I started a coaster book project today, using on of the swirl die cuts, painted with blue metallic paint, then sponged on some gold...All stamps are from Innovative Stamp Creations, I used Ranger Glossy Accents over the word Cherish, but it was not dry enough to put the book together...
Close up details of the flourish on this tag book...
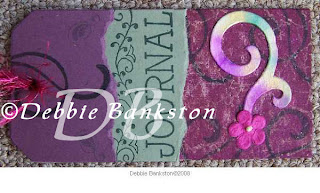
I started out with a chipboard tag for the cover, colored it by rubbing the Adirondack Wild Plum pad directly onto the tag...I stamped the swirl image from Innovative Stamp Creations with Library Green Archival ink...then over stamped with Gold Brilliance and a background crackle stamp...I cut two other tags to do the layering with...one from a sage green color and one from a plum color cardstock...tore those tags to layer on the cover...added the flourish die cut and prima flower...I use Gold metallic dimensional fabric paint to make my flower centers, quick simple and easy...Swirl/Flourish die cuts available on my studio blog at http://thestudioinpreston.blogspot.com/

Saturday, January 26, 2008

Swirl/Flourish on a card

I added this glossy black cardstock swirl flourish to the ribbon on the card...Stamps are from Innovative Stamp Creations...I had quite a few emails asking for more info on this card, background, tag, etc...so here is what I did...I started with a black folded card...then trimmed down a piece of black cardstock to be a card front layer...5.25 x 4...I then used a few different metallic paints and piece of saran wrap scrunched up to be my applicator-with me, anything can become a paint applicator...LOL...anyway...I added the metallic paint colors kinda in layers, starting with the darkest color working up to the gold...I love making faux metal looking backgrounds like this...its something I have done for years as a decorative artist...after the paint was dry...I slipped just part of the card front layer into the Cuttlebug embossing folder and embossed just part of the card front...I used the same paints and swiped them onto the die cut tag, then added the gold with the scrunched up saran wrap...I stamped the image in Black Document ink and trimmed the edge of the tag with a gold metallic paint pen...I also used the pen around the card front layer...I used a piece of organza ribbon from Really Reasonable Ribbon-Debbie Littlejohn has some awesome ribbons...and attached it to the cardfront layer using brads in a color that matched the faux metal paint effect...I then added a swirl cut from black glossy cardstock...it is just looped thru the ribbon and not actually glued to the card front...I used pop dots to raise the tag layer on the card front layer...I used a jump ring and added some charms and a bead...the two round metal pieces were from some embellishments I had in the box and the color worked so I added them...
This is a sampling of some of the swirls and flourishes I cut...Chipboard, glossy cardstocks with Alcohol ink background...vellum, pattern paper and more...These die cut shapes are awesome...I will have more to share tomorrow...

Bragging going on here...

This is my grand daughter...needless to say...she is Nammy's little angel...She was part of the Homecoming Court for her school today...So we spent the better half of the day taking pictures, video and letting her be a little princess...She had a blast...and Oh my...is she a little drama queen...I just had to share her excitement with you all...
This is her escort and also the boy that gave her a heart necklace for Christmas...LOL...

Thursday, January 24, 2008

The Flourish and Swirl Die Cuts are here....

y'all...i got the new flourish/swirl dies in...Oh my goodness...I had to go by my studio at lunch just to open the package and cut something...anything...these swirly flourishy shapes are gonna be so much fun...I have a special offer package on my studio blog at http://thestudioinpreston.blogspot.com Order this special by Friday evening...and get a special freebie with it...I cannot wait until Saturday afternoon...I am gonna flourish everything I have time to...will share more later...

Monday, January 21, 2008

Tag Book Art

I just love making tag books to use to display photos in...I will add photos from a day trip with the kids to this one...for now, I have the covers finished and the inside pages ready to work on...
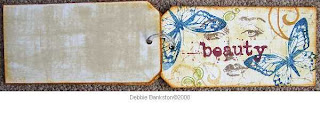
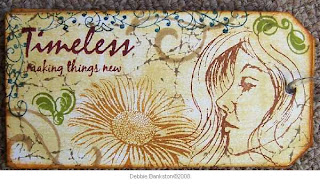
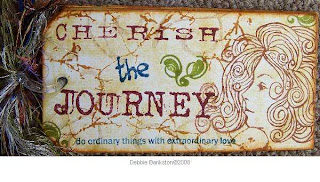
I used chipboard tags for the covers and cardstock pages, I cut 4 textweight tags to stamp and cover the chipboard with...I used Ranger Distress inks to color the white cardstock and textweight paper before stamping...
I stamped each of the textweight tags for the covers, then glued each onto either side of the chipboard tags...Notice, how just dragging the ink pads across the tags gives you a faux fabric texture effect...I like that as a background to stamp on...I used Ranger Adirondack inks to stamp the beautiful Innovative Stamp Creations images you can see these and all of Betsy's store at http://www.innovativestampcreations.com
I used Butterscotch Adirondack ink to sponge the edges of each tag...Butterscotch is one of my favorite ink colors and I use it regularly...This pad is over 10 years old and all I do it reink when needed...
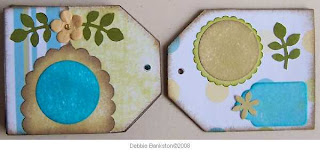
I added a closure and some fibers for added interest...I will add my photos and some other stamped images and verses later...

Friday, January 18, 2008

Debbie's Die Cuts-New Product Update

I just love flourishes and swirls...I will have these two really cool shapes in about a week...The long swirl shape is approx. 4 x 1 5/8 inch and the small shapes are approx 2 x 1 3/16 inch...
Check out the studio blog at http://thestudioinpreston.blogspot.com for a special pre-order offer on these two awesome die cut shapes...

Thursday, January 17, 2008

Debbie does ATC's, Mini ATC and "inchies"

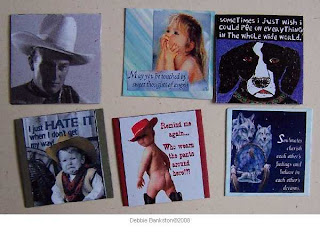
The pages from those greeting card magazines are awesome for ATC, Mini ATC and "inchie" art...My hubby gets lots of junk mailings and I raid his trash can occasionally...LOL...actually, its gotten to the point he says, do you want this before I throw it away...he is such a good hubby...
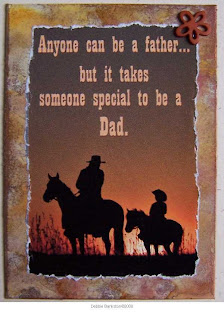
I just loved this card front ad and the torn look works great on this ATC...the background on the ATC was painted off white acrylic paint, sanded smooth, then Ranger Alcohol Ink and Copper Metallic Mixative was used to color the ATC...
I think the Mini ATC's are just awesome...smaller in size than an ATC...they are 1.5 x 2.5...I used my distress pads to add color to the chipboard Mini ATC's...then glued on the trimmed down pictures...
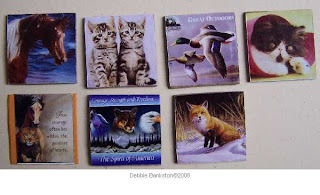
So many of the card ads are perfect in size for "inchies"....these were so much fun to make...I used chipboard, cardstock and glossy with AI backgrounds for these "inchies"....
There is so much variety with these types of ad magazines...I just love the animals I used here...

Wednesday, January 16, 2008

ATC Artist Trading Cards are Fun to Make

I love to make ATC's...so much, that I designed my own custom die, so I can cut them from just about everything imaginable...This one uses some of the beautiful images from Innovative Stamp Creations...I used one of the photo holder die cuts as a label on the frame...I stamped the face image on the ATC and then used a background crackle type image to stamp the ATC frame...
This is one of my favorite stamp sets from The Angel Company...I stamped the Giraffe image, masked it, then stamped a background image over that...I then used some chalking to accent the giraffe...I inked up the frame by just rubbing the ink pad across the white die cut, then stamped the words...on the Mini ATC, I stamped the background image, then the giraffe wording and sponged some darker ink around the edges...
This framed ATC uses more stamps from Innovative Stamp Creations...I stamped the scenic image in blue ink on the white ATC die cut, then used some chalking to add effects...I stamped the frame with the background image and wording, then sponged blue ink around the edges...This is one of my favorite ATC's I have ever made...
I stamped this image from Innovative Stamp Creations onto a glossy cardstock ATC and then used various Marvy Waterbased Markers to color the image...I did heat set the Archival black ink before coloring...
Be sure and check out my studio blog to order an ATC kit http://thestudioinpreston.blogspot.com/ Email me at debbiesdiecuts@yahoo.com for more info...

Tuesday, January 15, 2008

Mini Tag Book Kit-Tutorial

Here is the finished book cover...with clear snap ring binder and fibers...The Mini Tag Book is approx 2.5 x 3 inches...
This is the front and back covers...I used 3 different color coordinated pattern papers throughout the book...I covered the chipboard with pattern papers outside and inside...
On the insde tag pages I used torn tags layered over the cardstock pages...
Assorted punched and die cut shapes were used to make each little pages layout...

Mini Tag Book Kit-Tutorial part 2

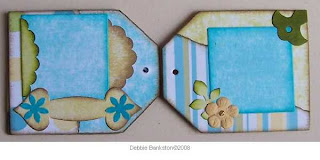
I used a domino die cut on the page on the left, below is a picture of the little foldover opened up...

The page on the right has another domino die cut foldover...
The scalloped punches are perfect size for the tag pages...
Overview of the Mini Tag Book kit...for info about ordering this kit see my studio blog at http://thestudioinpreston.blogspot.com

Saturday, January 12, 2008

Coaster book with die cuts

Yeah...look was I learned to do...LOL...make a copyright watermark and put on my photos...My very good friend and designer, helper, enabler, Donalda, taught me how...the other night on the phone...She gave me a mini class and walked me thru it...How cool is that...I just had to play around with it to see how it would look...pretty cool I think...
This is a Coaster Book project, I actually did as a sample to teach from...but its still one of my favorites...I used lots of various colored cardstock die cuts and pattern papers as well as rubber stamps from Innovative Stamps Creations...
I Cuttlebug embossed some of the frames and shapes to add texture and interest to the layouts...I also distressed some edges of the various die cut layers, also for added interest...

Be sure and check out my Die Cuts store at http://www.picturetrail.com/debbiesdiecuts for all the die cuts I have and lots of other samples and stuff...

Tuesday, January 08, 2008

Heart book in blue part1 Tutorial

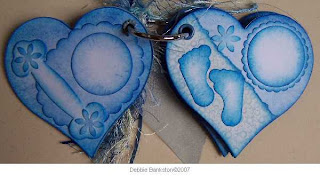
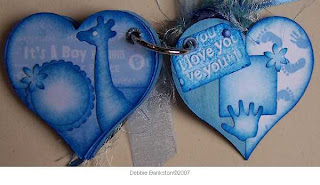
I was asked to make a heart book in blues for a baby boy...This is what I came up with...I did the cover similar to the pink book...
I ended up finding my 8.5 x 11 pattern paper in boy themes and blue colors...
I couldn't resist using the little foot punched shapes on the bubble background layer...a first bath photo would be precious here...
The hand punch shapes make a cute embellishment as well on this page...

Heart book in blue part2

These two pages have the domino die cut folders, for extra photos...
I just had to add a blue giraffe...nothing says boy, like a blue giraffe...LOL...I cuttlebug embossed the tag on the opposite page with the i love you...
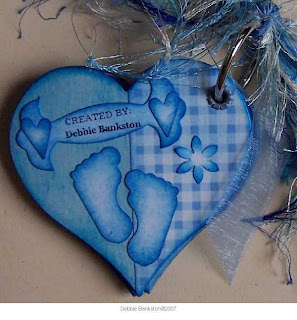
This is the back cover...I used Sailboat blue and Stonewashed blue inks from Ranger, as well as the light blue Adirondack acrylic paint to cover the chipboard heart...then I layered the pattern papers that were either torn or cut, depending on the look I wanted for that page...I think she will like this little heart book in blue...