Sunday, November 30, 2008

Kreativ Blogger Award


I was given the Kreativ Blogger Award by Robin ...She is such a talented paper crafts person...I want to pass the award on to a few others that I am inspired by ISC Betsy, has gorgeous stamps and has been a blessing in my life from day one... Donalda a great friend and she does some awesomely creative art work using my die cuts as well as stamps from various companies... Claudia who uses my die cuts in some of her amazing creations, her work is beautiful and inspiring... Dianne who I have known for years, we met at a rubber stamp convention, way back when, she is so inspiring in her art as well as her devotions...There are numerous others...
Saturday, November 29, 2008

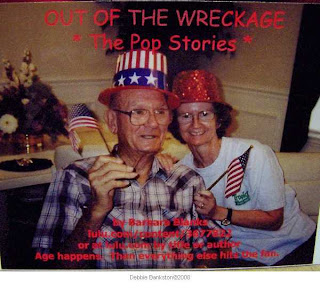
A good book to share...

This is my friend Barb and her "Pop"...


Have you ever had to be a caregiver to an elderly family member...if so, you will appreciate the humor that this book brings...If not, you will appreciate knowing that you can find humor in the things you will be put thru, once its your turn...My first experience, I was 16 years old...I spent just about every weekend and all my days off from school, my junior year, helping look after and taking care of my great grandmother...and I have helped care for numerous people since then...Well, anyway...A very good online friend of mine, Barb aka St. Flossie, has written a wonderful book...that I think you will enjoy...You can read about the book and a short blurb here www.lulu.com/content/3677822
You can contact the author directly for ordering, etc if you like StFlossie@aol.com make sure and put book info or something in the subject line to let her know what you want...she is like me...if she don't know...she deletes...LOL...
But, make sure you have Kleenex in hand...

Fried Angel Food Cake Dessert

Oh my gosh...talk about sinfully good...
Use a good quality angel food cake...I used a fresh one from the grocery store bakery...
You will need, an Angel Food Cake...
softened butter
softened cream cheese, 4 oz
1/4 cup powdered sugar
1/4 tsp vanilla extract
2 tblsp jam or jelly of your choice...
Slice the Angel food cake to 1" thick slices, lightly butter each side of the slice, fry in a non stick skillet until golden brown on both sides...watch it closely
while the cake is frying, mix the cream cheese, powdered sugar and vanilla extract well...
heat the jam or jelly so its syrupy...
when the cake slices get done, add a dollop of the cream cheese mixture, then drizzle with the jam/jelly...
enjoy...or inhale...LOL...this is so good...and so easy...
...in the south...if you can't fry it...it ain't worth eatin'...

Friday, November 28, 2008

Fall Card

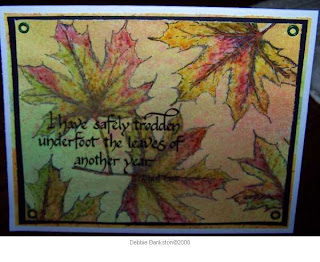
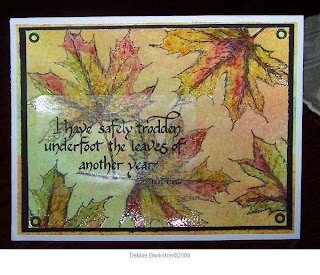
I just love the new leaf images from http://www.innovativestampcreations.com Betsy has some of the prettiest leaf images yet...I bought some of those Mini mister bottles from her and decided to make my own color wash type sprays...I filled the bottles with water, added some drops of reinker to make a red, blue, yellow and green shade...I spritzed the cardstock lightly with the various colors, I stamped the leaf image with black document ink, same as black memories ink...after the black images dried, I colored each leaf using ink directly from the Adirondack ink pads to color the leaves...I coated each leaf with versa mark ink, then clear embossed each image...I added another layer of spritzed color, then layered the card...
I was really in a hurry trying to get this card finished, I needed to mail it today...so I used a clear vellum sticker for the sentiment...it looks kinda funky in the photo, but I think its because the way the flash hit it...It really looked nice in person...I attached the stamped layer to the black layer with double stick tape and dark green eyelets in the corners, then layered that onto a piece of pattern paper, then onto the white card base...I used a sticker inside that said Faith...
Be sure and check out Betsy's newest stamps too...I just ordered them...and she already shipped them...yeah...new rubber next week...

Thursday, November 27, 2008

Artwork share from Karen...

http://karenscreation.blogspot.com/
I just had to share with you, what Karen has started doing with some of her order from Debbie's Die Cuts...the luggage book and the boxes are wonderful and she is working on a tag book she will share soon...So if you get a chance to look at Karen's blog, please do so...her work is great and she also enjoys sharing what she creates with others...
Wednesday, November 26, 2008

Embossed Frame Coaster Hanging/Magnet

This technique is an original created by me... I had a few questions lately about exactly how I made this project...so I thought I would look it up and repost it here again...I used a coaster, punched holes in the top corners, rubbed it with an ink pad to add some color, then used a sponge and inked the edges...I threaded the ribbon thru the holes and tied little knots...
Now, for the embossed photo frame...I used a small frame die and a photo...I recommend practicing this using random photos, that you can afford to mess up...or you can even use magazine picture to practice...Decide which part of the photo is going to be your centerpiece...Run this thru your die cutting machine with your photo in place...remove the center...you do not emboss it...then decide which embossing folder you want to use and emboss the frame part of your photo...Add a layer of foam tape, or pop dots to the back of the frame...Place your frame in place on the coaster, then replace the center piece photo, by adhering it flat to the coaster...This is a neat project to make with those otherwise, not quite good enough for a layout photos...but do this to them...and they take on a whole new creative appeal...

This close up shows the detail a little better...You can also adhere the frame flat and raise the center piece with pop dots...I have used various frames to do this technique and all the results have been excellent...You can add this technique to a variety of projects, card fronts, handmade calendars and more...remember,
You are only Limited by Your Imagination...


Sunday, November 23, 2008

More Candy boxes and ideas.......

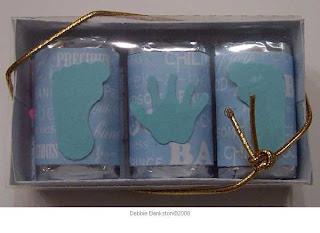
Baby shower favors...boy...

baby shower...girl....
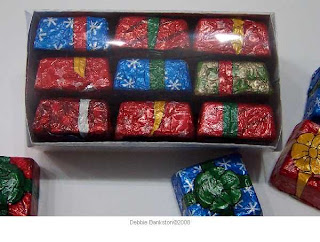
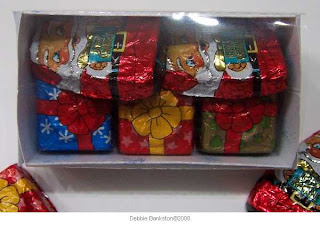
what about those cute little decorative wrapped chocolates...these santas are so neat...


these little candies were perfect...the little package wrappings are great for this gift box...


and it looks great to mix the two...Cause after all Santa does bring the presents...


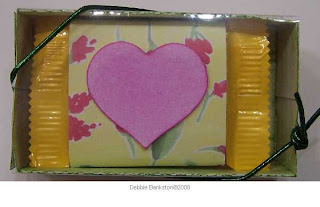
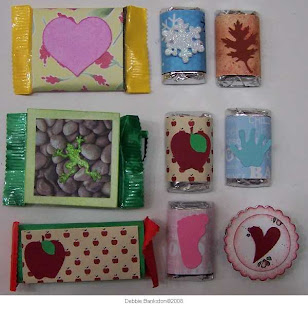
these are some of those new Russell Stover candies...this one is vanilla creme brulee...Oh my gosh...but, for the idea...I used a pattern paper, covered the candy bar, added a die cut heart that I colored to match the flowers in the print...this will be great for Valentines...


I had to make one that was more boy themed...and this little pebble background paper, was too perfect to pass up...I added the punched frog shape...he kinda looks like he is sunning on those pebbles...my grandson will love this one...


but, the nice thing about those candies...they are so pretty, you dont even have to wrap them...


yeah, i kinda went crazy with the candy today...I bought four bags, but had coupons...so i only had to pay for two...yeah...these are going to be for those extra special folks over the next few weeks...


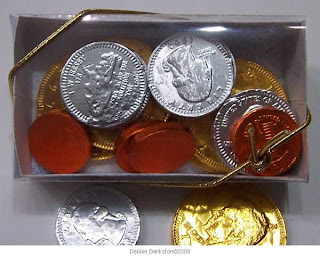
I am doing this for my nephew and nieces...they will get chocolate money and under it will be some real money...they will get a kick outta this...


The individual wrapped lifesavers are so good...I always buy them to share at work, etc...so I just had to try a box with them...its very pretty and festive looking...and will great for kids too...


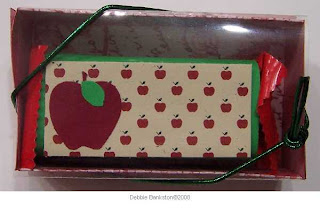
now, i love to make teacher stuff...i have made stuff for teachers since I was 15 and still in school...this pattern paper with the little tiny apples was just begging to be used...and this apple punch fit perfect on the little hershey miniature bars...i punch a branch that has leaves on it to make my leaves for the apples...


I also had kit kat mini bars in the studio...yeah, I know...I am a chocolate junkie as well...I wrapped each bar with a green text weight paper, added a layer of the apple paper, just to the top side and then a punched apple with leaf...my grand daughter has two teachers this year, so they will be getting these...


This shows some of the candies I did and how they look outta the boxes...I have more in the works, but ran outta day light...LOL...which basically means, it was time to come home and fix the pot of chili I promised hubby...yum, chili dogs for supper, perfect for this cold weather we are having...be sure and check out my studio blog http://thestudioinpreston.blogspot.com


Saturday, November 22, 2008

Clear sleeve candy boxes

Oh my...did I have fun in the studio today...We had a scrap and stamp day...and this is some of what I did...I now have clear sleeves to make the matchbox die cuts even more fun...I used my ginger colored ink and stipple brush to color the white die cut box part, wrapped my mini candy bars with pattern paper, added the punched leaves from rust colored cardstock and a clear acetate sleeve...I added some gold elastic just for looks...
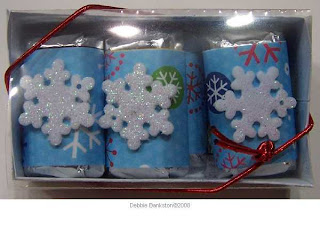
This box was fun to make...I had this really neat snowflake paper, I covered the candy bars with...added some cute little glittery snowflakes, like for mini Christmas trees...and red elastic...

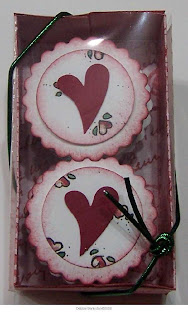
This is one of my favorites to make...I use the small peppermint patties and my small nestie scallop to cut the covers, I used my 1 1/4 inch round punch and a pattern paper with a small heart design for the layer and then a heart punch...I used a green elastic on this box...


I will have kits for sale on my studio blog http://thestudioinpreston.blogspot.com give me time to get it loaded and posted...


Friday, November 21, 2008

Road Trip today


I had to make a road trip to the dentist today...my dentist is a little over an hour from my home...and on the way, we pass this old grist mill area...I have never had my camera with me before...and just happened to grab it this morning when I left out...Its called Fickling Mill and its outside of Butler, GA...its a beautiful place and I had wanted a photo of it for a few years now, well, I finally got photos...so I wanted to share them with y'all...


Wednesday, November 19, 2008

Treat Box Project

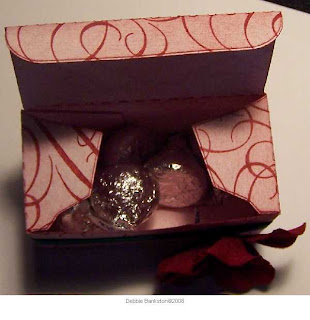
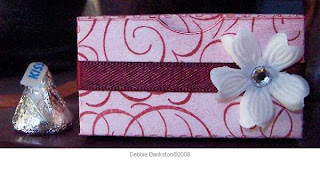
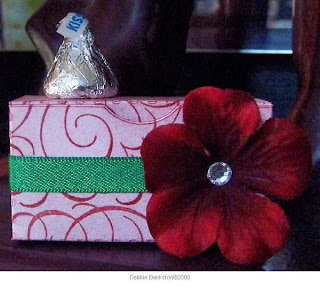
I used my trunk box die cut to make the little treat boxes to fill with kisses and mini candy bars...
I used a beautiful background stamp from Innovative Stamp Creations and stamped the white die cut with maroon ink, then used the same ink and my stipple brush to color the box...I added green ribbon with a beautiful maroon/red flower with a clear crystal center...

Maroon ribbon with a white silk flower...


Gold wire edged ribbon with maroon silk flower...same box, different ribbons...I only had time after work today to make one to show...I am going to do these as some swap gifts at the womens club Christmas party in two weeks...I think they will like getting these little treats...Check out my studio blog to order the plain white die cuts, http://thestudioinpreston.blogspot.com


Tuesday, November 18, 2008

Another wooden ATC...these are so fun to make

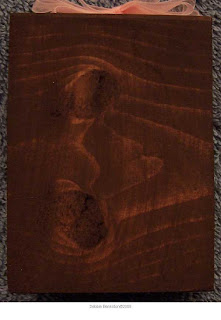
I painted my wooden ATC with brown oxide colored acrylic paint, why that color...cause it was the first brown paint I saw in the box...LOL...I just used a sponge, dipped it into the paint, and rubbed it all over the wood piece...thats my idea of basecoating, when I am in a hurry...
My pictures are a little out of order...but I left them like they were...This shows the detail of the bottom half of the ATC...I added some metallic gold ink sponged lightly onto the corners and little up the sides...

You can see the metallic gold on the top corners and trailing down the sides a bit...


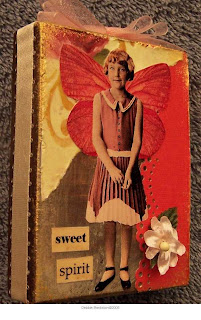
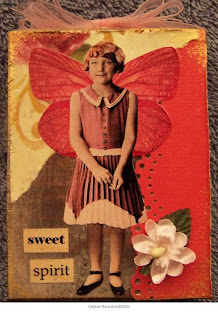
I used redliner tape to attach the picot edged cream colored satin ribbon around the edges of the ATC...I made a little quicky bow from some light pink organza (Really Reasonable Ribbon) and added it to the top of the ATC with a glue dot...


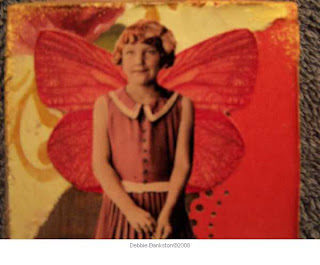
I love that new border punch from Martha Stewart...I added all the elements except the flower with Ranger Glossy Accents as my glue, then applied a thin coat over the entire piece, I glued the flower on with a pop dot, after the front was dry...The collage image is from Lisa's Altered Art images...patterned paper scrap and bazill cardstock used...I rubbed some off white and a touch of metallic gold paint, kinda hit and miss over the dark brown basecoat...I don't know what made my photos yellow so much, I will take some better pictures in day light later...
For a Wooden ATC and Inchie kit, check out http://thestudioinpreston.blogspot.com This kit will be for a limited time only...


Monday, November 17, 2008

Wooded Inchies...

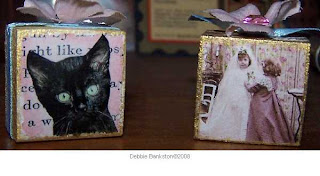
I had fun with these little babies today...I only got two finished to show ya...but got more in the works...these are the tops of the ones I got done...
these are the sides...one is painted with gold paint, one has brown paint, dragged over the off white back ground...

I started by basecoating each wooden inchie with off white paint, I glued the kitties on each side of that inchie, then color the sides and just around the edges with gold metallic paint, the other just has the gold paint on the edges, not the sides...


This is the other side of each inchie...these are from the inchie sheet from Lisa's Altered Art..she has some awesome collage sheets to create with...


Wood and ATC's...

I have had these wooden pieces cut for about a year...they got put in a box...and of course, outta sight, outta mind...I used to paint similar size pieces as shadow box art, way back in my decorative painting days...I will have to find one of mine and show ya someday...the art I kept is packed up too...anyway...I cut these the size of ATC's...I was going to paint them...but decided I would do some collage stuff to them...I kinda got carried away with this first one...I have two more started, and will make pictures when they are finished...Oh, and I also did some inchies...
This is the top of the 2 inch thick ATC...I am working on two 1 inch thick ones...can't wait to see if they turn out like I am hoping...I glued the piece of lace down kinda randomly, then added the leaves and flowers...
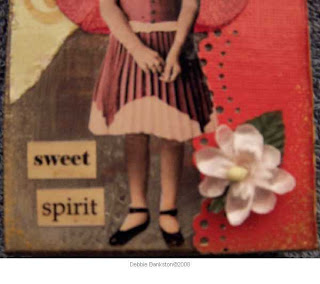
This is one end of the ATC...I love that Martha Stewart punch...I glued the punched pieces down with Glossy Accents...

This is the other end of the ATC...I did not want the ends to be alike, as the sides are different as well...plus, this was an experiment piece...I figured I would make all my boo boo's on this one...LOL...then maybe not make so many on the others...yeah, right...


I just love the collage sheets from Lisa's Altered Art...Oh my...I have been wanting to use this one...and it was perfect for this side of my thick wooded ATC...I used my fence die cut, rubbed some brown paint and then spattered it with black paint...I was after an old wood fence look...Oh, forgot to say, I started by basecoating the wood ATC with off white paint...then I painted the back ground with blue and green and added a few clouds...see, I told ya I was gonna paint them...LOL...anyway...I then added the brown to color the edges and let the sponging, kinda vinette around my background painting...I also spattered the background...I spatter stuff alot...I cut the girls image out, and hopefully made them look like they were sitting on that fence...then added the words across the top...I coated the whole thing with Ranger Glossy Accents...I love that look...and I went to school with a gal that was just like that one in the crown...


I love birds...so any excuse to use those beautiful bird images from Lisa's Altered Art are fine with me...I colored this side with the blue and green paint, kinda smeared all together, to make a more teal or aqua look to it...I added some gold paint sponged onto the edges kinda randomly...I added my collage pieces, then sealed the whole piece with Ranger Glossy Accents, then sprinkled on some Beadazzles...I added the flower after the piece was dry...