Thursday, November 29, 2007
Special offer on Sticky Note Cover Die Cut
Check out my studio blog at http://thestudioinpreston.blogspot.com for a special offer on the sticky note cover die cuts...
Sticky note cover die cut-simple gift ideas
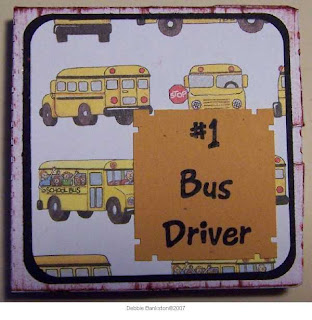 These are so neat to theme...and with the help of patterned scrapbook paper, they are so easy and quick to make...I just used ink directly from the pad to color the white die cut, then cut black cardstock to size, cut the bus pattern paper a bit smaller and layered on the front of the cover...I did use my corner rounder on both of those layers...I then trimmed my #1 Bus Driver computer generated image and used my Marvy Southwest Corner punch on it...
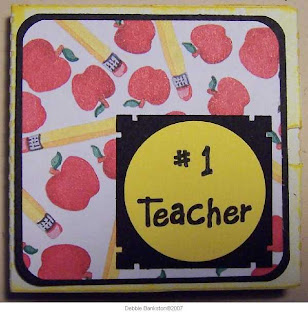 I could not find my apple punch...dang it...its buried under something I am sure...So anyway...I used my round punch for the yellow computer generated piece, layered onto a black square...The school pattern paper is perfect for any teacher...That means the 4 that will getting these at school for sure...LOL...
 The front of the sticky note books
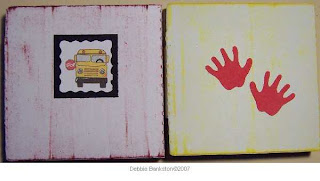 The back of the sticky note books...its not necessary to do the backs with anything...but, I can't leave well enough alone...I have to add something, if there is blank canvas to work on...The little hands punch is perfect for teacher gifts...
 I use a label format on my computer and print out sheets of the various phrases, words, messages, etc that I want for my sticky note covers...This is great when you have lots of themed books to make...or if you make them for Craft shows, etc...
Sticky Note Cover Ideas
 This is an assortment of Sticky Note Die Cut Covers I have made lately, or ideas from the past...You can see the diversity of gifts you can make using these neat little covers...They can be stamped, painted, layered, inked and more...If you have any questions, just email me...I will be happy to help ya debbiesdiecuts@yahoo.com
Monday, November 26, 2007
Sticky notes how to part 1
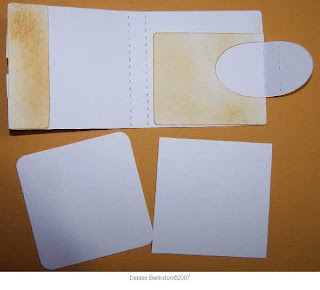
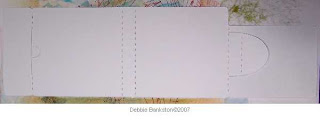 This is the sticky notes cover die cut...it does look a bit confusing at first...but its really easy...
 This section, colored with ink...is folded in...to help stabilize the back of the book...
 This opposite side, is the front inner flap, that creates the pocket for the closure tab...Apply glue only in the dark colored areas...be sure and leave the middle section with no glue...
 This is how the back inside flap looks after its folded in and glued into place...
 This is the front inside flap glued into place...
Sticky notes how to part 2
Friday, November 23, 2007
Quick Candy Bar Idea
 I just had to share this...Snicker mini candy bars, 8 for $1.00 at Dollar General...Stamps from Innovative Stamp Creations...Betsy has a neat new Christmas sheet...I cut the cardstock to size, 2.5 x 3.5, then molded it around the candy bar, so I would know, where I need to stamp each image...Then using Library green ink, I stamped the images, I used Maroon to dust the entire piece...
 I wrapped the candy bar and glued the new wrapper into place, you may have to secure the cardstock to the back of the candy bar, if it does not want to stay on well...Sometimes, the larger or thicker the candy bar you are wrapping, securing your homemade wrapper to the back with glue is necessary so the wrapper stays in place and looks good...
Ornament boxes with Innovative Stamp Creations
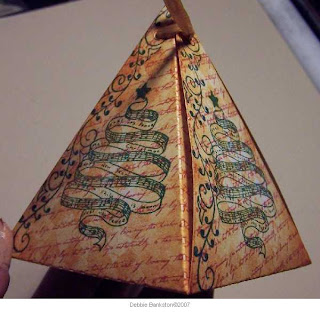 I just love my new stamps from Innovative Stamp Creations....The background script, tree and scroll image were perfect on this ornament box...
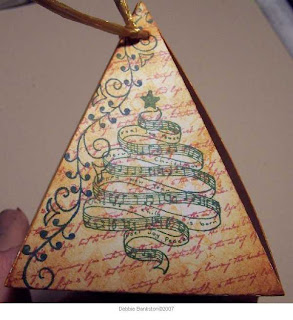 After I stamped all the images, I used butterscotch ink and my stipple brush to color the box...
 This is one of my favorite ornament boxes so far...I love using the large scalloped punched shape with the ISC image...I attached it to the box, using a red heart brad...I created a new cookie for the holidays...and this will be perfect for my employee Christmas party favor...
 I used the ISC ornament stamped in Maroon over the entire box, that stamp is so awesome...I then lightly dusted the entire box with Library Green ink...I used a beautiful red raffia from Really Reasonable Ribbon to tie the box closed and make the hanger for the ornament...Now, I have to make 27 of these...and then make the cookies to go in them...Be sure and check out the special on my studio blog for a pack of these ornament boxes http://thestudioinpreston.blogspot.com/ Tell me you saw this posting about the ornament boxes, and get a special freebie with your order...
Snowman candy bars and treat box-Mini Tutorial...
 I stamped the little snowman image from The Stamping Studio on my candy bar wrappers...then colored the carrot nose, heart and ear muff and mittens with marker...I dusted the entire piece with stonewashed blue adirondack ink...
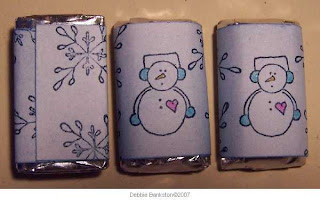 I stamp the snowflake image on the wrapper around the snowman image...then just glue the wrapper with glue stick to secure around candy bar...
 I attach the photo holder handle the the box with mini brads...
 Side view of box, showing snowflake images stamped on sidees and little beads for feet on the box bottom...
 The large snowman from The Stamping Studio is stamped on the matchbox sleeve...This box sleeve was cut from glossy cardstock and colored with adirondack alcohol inks...
Labels:
Matchbox,
Nugget box,
Tutorials from Debbie Bankston
Saturday, November 17, 2007
Tag Book Kit-How To Ideas-Tutorial
 This is a sample of how the cover can be embellished using pattern paper and die cuts...I colored the tag page by rubbing an ink pad over the tag...then I tore the pattern paper tag in half and sponged ink along the torn edge...I like to use brown for this, to make it look more like the torn edge was old...I color all the white die cut embellishments with inks, either by rubbing the ink pad directly on the die cut, or using a sponge, or color duster or stipple brush, or even a waded up piece of plastic wrap...
 I used a mini envy die cut as a pocket on this page...along with a photo holder die cut to accent the pocket
 Here I have used some of the frame center cut outs as places for small photos or journaling, accented with a photo holder die cut, cut in half...small tags, and other small die cut shapes, make perfect embellishments...
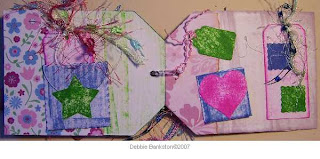 Here is another example of a pocket made from another mini envy die cut, I also used the domino die cut as a mini foldover with the heart for the cover...The small scalloped squares on the tag are from a punched shape
 The back cover can be used for an extra photo, or a place to add a sentiment, etc if you are giving this tag book as a gift...These books make wonderful ways to share those photos that aren't quite up to our big scrapbooks...my favorite thing is to get wallet sized photos made to use in these books...the wallet size photos work great in the two frame sizes in the kit, with very little cropping needed...For a more custom look use pattern papers that help enhance your photos...such as Christmas, birthday, summer, etc...
See the special offer on this tag book kit in the next posting...I will be sharing the books I am working on soon...
Special Offer--Debbie's Die Cuts Tag Book Kit-2 days only
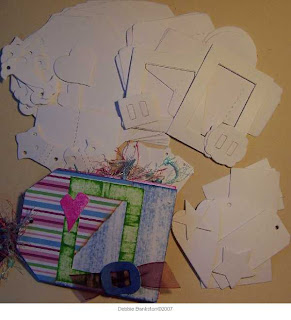 This is one of my favorite mini books...I am starting some as Christmas gifts now...so I decided to offer a special on this tag book kit...Each kit comes with enough white 110# cardstock die cuts to make 3 books with die cut embellishments...The book is approx 4 x 5 in size with pre-punched hole in the end...This kit will also include the clear plastic snap rings as a closure method for your books...or you can use ribbon, fibers or other closure methods as well...I will also include a sampler pack of fibers and ribbon for you to use in your book...and as a bonus, 1/2 dozen pattern paper tags...Email me at debbiesdiecuts@yahoo.com to place your order...Each 3-book kit is $11.95 and that includes US shipping/handling...I also have other samples of my tag books on this blog in previous postings and at http://www.picturetrail.com/debbiesdiecuts I take paypal...
Monday, November 12, 2007
I've Been Framed Sampler
 A sampling of frames from Debbie's Die Cuts...The possibilities are endless...
 A 4 x 5 frame stamped, ribbon added...these are peach blossoms from my backyard...
 Check out my studio blog for a special offer on the frame/photo mat die cuts I have...See more samples too http://thestudioinpreston.blogspot.com I am making decorated frames to give to friends and family this holiday season...Stay tuned for more samples and how to details...
Sunday, November 11, 2007
Random playtime today
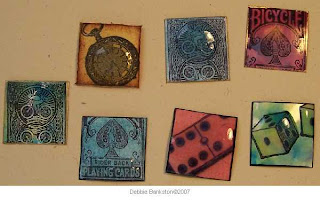 I only had a little bit of playtime in the studio today...most of it was cutting orders...but I had to make a few inchies...These are stamped on regular and glossy cardstock...I used game piece images from Enchanted Ink...I added some Ranger Glossy Accents to embellish some of the images...
 I ironed a piece of CocaCola fabric to some cardstock using heat n bond today, then cut out a pyramid/ornament box..
Saturday, November 10, 2007
Luggage Memory Book
 I love this die cut...and have been anxiously waiting to create a mini book with it...This book is approx. 2.5 x 5...The covers are cut from chipboard and the pages from tan cardstock...I used a few of the photo holders to make the faux straps on the "suitcase"...I used distress inks rubbed onto the die cuts to add color...All stamps are from Innovative Stamp Creations http://www.innovativestampcreations.com
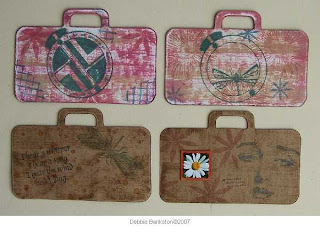 This shows the inside of the covers and the backs of two of the pages in the book...
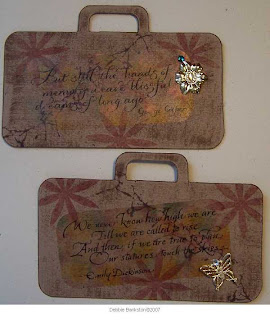 This is the back of the other two pages in the book...The stickers here are clear vellum, I used alcohol inks to add some color before adding them to the pages...the charms are glued on using Ranger Glossy Accents...
Luggage Memory Book 2
 I wanted to create a background for my photo to layer on top of...I used some masking to create the mountains and then over stamped with the tree image...
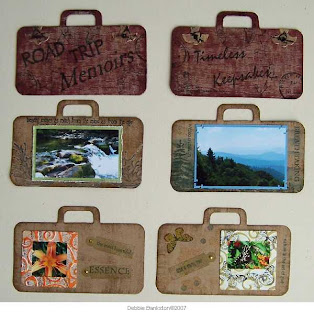 This shows the covers and four pages of the book...
 This was a fun book to make...it holds wallet sized photos perfectly...Be sure and check out my studio blog http://thestudioinpreston.blogspot.com for a special offer kit to make your own Luggage Memory Book...email me at debbiesdiecuts@yahoo.com for more info
Ornament Box-Perfect for a Shower
 This box would be perfect for a shower, baby or wedding...just change colors as needed...I started by stamping the Harlequin background stamp from Innovative Stamp Creations all over the box...
 Then I ran the die cut heart thru the Cuttlebug embossing folder...I inked the folder up with Tropical Raspberry Sea Shell ink, then embossed the hearts...I used a sponge to add extra ink to the edges of the heart...this helps create dimension...
 I made bows from green 1/8" ribbon...glued them onto each heart using Ranger Glossy Accents...I also used the the Glossy Accents to glue the hearts onto the box...before the box was put together...
 Attention to detail...be sure your bows are as close to the same size as you can make them...The beautiful ribbons used are from Really Reasonable Ribbon...
Elvis Ornament Box
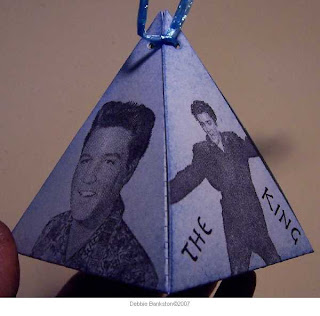 I stamped the Elvis images from Stampsmith onto the box, then used my color duster and Stonewashed Blue Adirondack ink to dust the box to a light blue shade...
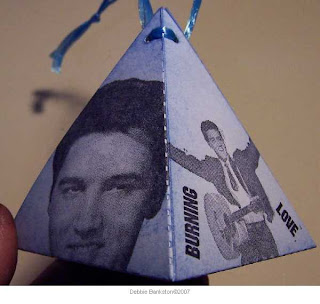 I think Hershey Kisses added to this box would make a great treat to share with anyone...Well, anyone you want to give a "kiss" to...
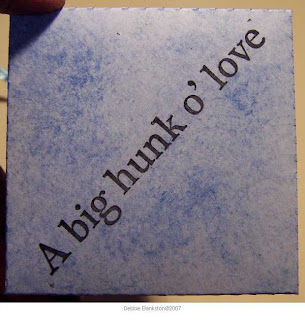 This is the bottom of the box...
Subscribe to:
Posts (Atom)
